Preparing Your Domain for CorePanel
This guide takes you from nothing to a working panel you can open in your
browser at an address like https://panel.example.com. No prior experience with
domains, DNS, or name servers is assumed — every term is explained in plain
language as it comes up.
By the end you will have:
- Registered a domain name.
- Created two name servers for it.
- Delegated the domain to your CorePanel server.
- Created the panel domain.
- Confirmed the panel loads over a secure connection.
The big picture
Section titled “The big picture”Before the steps, here is what actually happens when someone opens your panel. It helps to have this picture in mind — the steps below are just filling in the pieces of it.
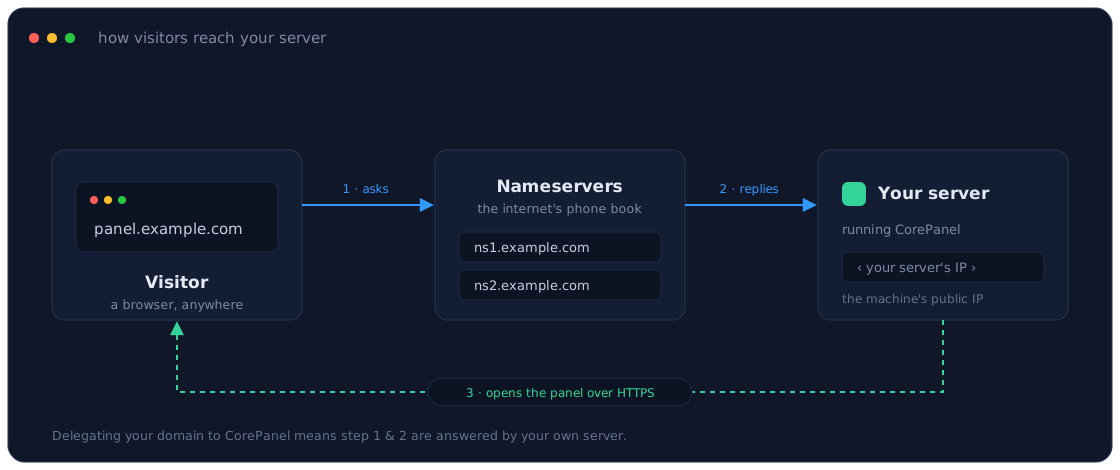
- A domain (like
example.com) is a friendly name. Computers don’t use names — they use numeric IP addresses like203.0.113.45. Your server has one of these. - Name servers are the internet’s phone book. When a browser wants
example.com, it asks that domain’s name servers, “what’s the address?” and they answer with your server’s IP. - Delegation is simply telling the world which phone book to use for your domain. When you delegate the domain to CorePanel, your own server becomes the phone book — it answers every DNS question about the domain itself.
That’s the whole idea. Now let’s build it.
Step 1 — Register the domain
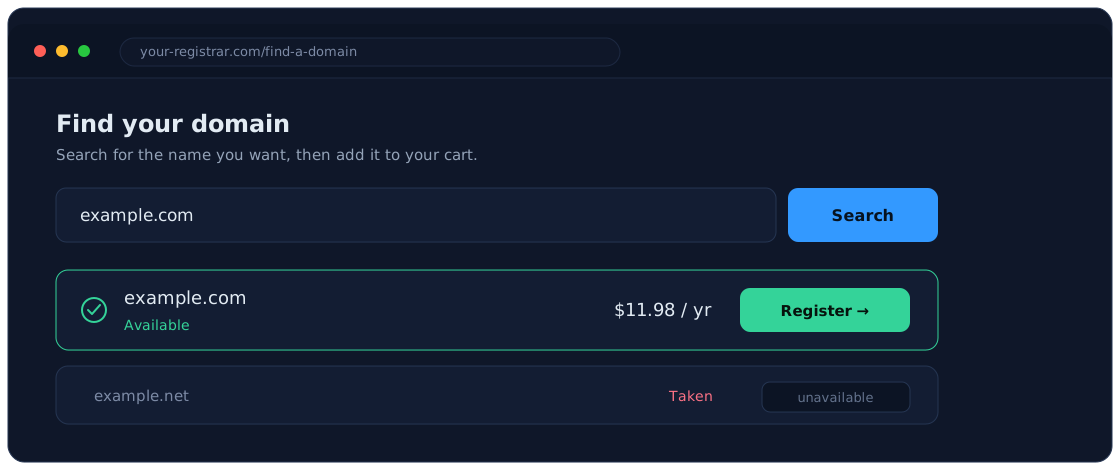
Section titled “Step 1 — Register the domain”A domain is rented, not bought outright — you register it for a year (or more) through a registrar. Popular ones include Namecheap, Porkbun, Cloudflare Registrar, GoDaddy, and many hosting companies. Any of them works; the screens below are a generic example, but every registrar has the same ideas under slightly different names.
Search for the name you want. If it’s available, add it to your cart and check out.
You’ll also want your server’s public IP address handy for the next step. If
you’ve already run the CorePanel setup wizard, it printed the IP; otherwise your
server provider shows it in their dashboard. In this guide we’ll use
203.0.113.45 as the example.
Step 2 — Create your name servers
Section titled “Step 2 — Create your name servers”To make CorePanel the phone book for your domain, you first give your two name
servers a name and an address. By convention they’re called ns1 and ns2
on your own domain — so ns1.example.com and ns2.example.com.
The address is the crucial part: each name server points at your server’s own public IP address — the CorePanel machine. That’s what makes your server the one that answers DNS for the domain. Both name servers point at that same server IP.
In your registrar’s control panel, find the section for registering name servers. Registrars label this differently — look for Register nameservers, Personal nameservers, Private nameservers, Host records, or Glue records — they all mean the same thing.
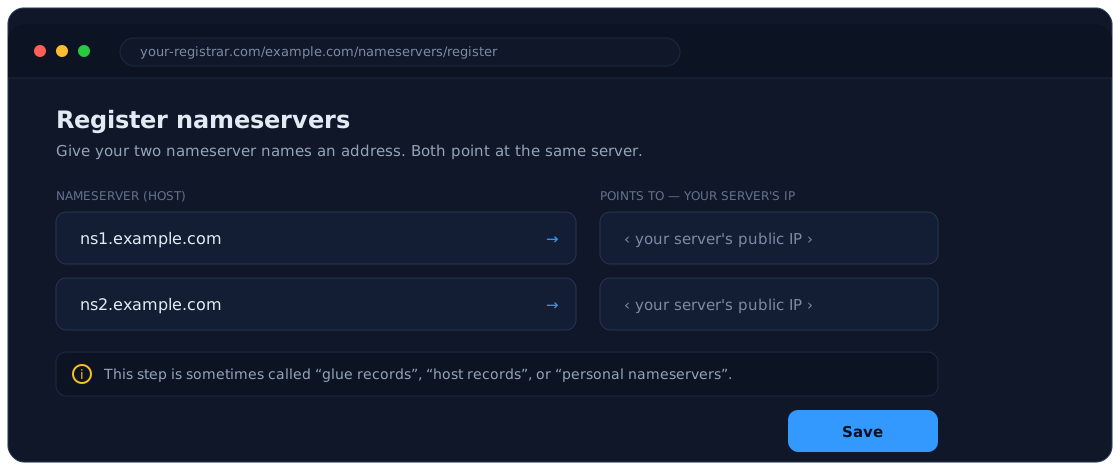
Enter both, and point each one at your CorePanel server’s public IP:
| Name server | Points to |
|---|---|
ns1.example.com | your server’s public IP |
ns2.example.com | your server’s public IP |
Save. You’ve now created the name servers, but the domain isn’t using them yet — that’s the next step.
Step 3 — Delegate the domain to CorePanel
Section titled “Step 3 — Delegate the domain to CorePanel”Now tell the domain to actually use those name servers. In your registrar, open the domain’s Nameservers setting, switch from the registrar’s defaults to Custom nameservers, and enter the two names you just created.
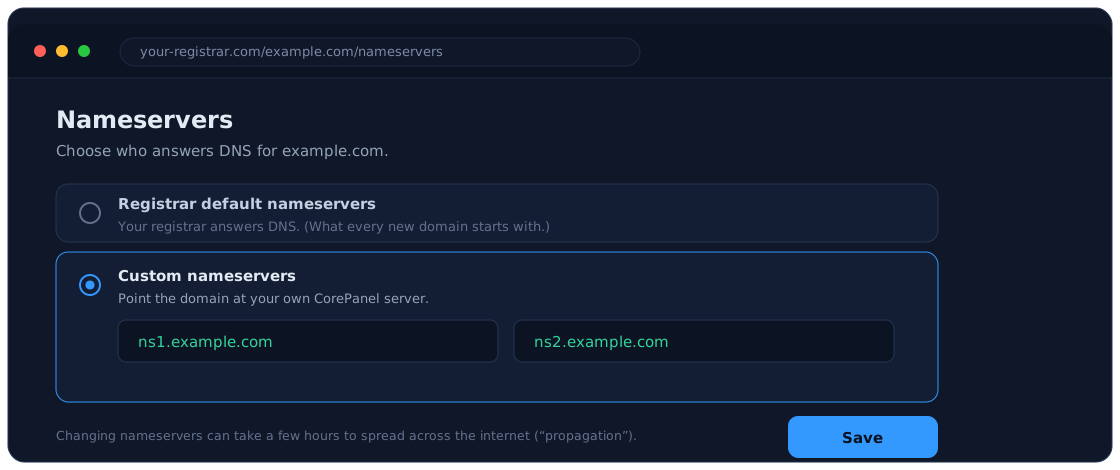
Save. This is the delegation: from now on, the world asks your server for
anything about example.com.
Step 4 — Create the panel domain
Section titled “Step 4 — Create the panel domain”The panel domain is the address you’ll type to open CorePanel — for example
panel.example.com. You set it on the server with the one-time setup wizard:
corepanel system initWhen it asks for the panel domain, enter panel.example.com. CorePanel takes
care of the DNS for you: because your server is now the phone book for
example.com, it automatically publishes the record that points
panel.example.com at itself, and it answers as ns1/ns2 for the domain.
There are no DNS records to add by hand.
The wizard is covered in full — including how it handles SSL and what each prompt means — in Initial Server Setup.
Step 5 — First sign-in and the setup assistant
Section titled “Step 5 — First sign-in and the setup assistant”Once propagation finishes, open your panel domain in a browser (or reach it by IP right away — see the tip in Step 4):
https://panel.example.comSign in with the user coreadmin and the password from the setup wizard.
The initial configuration assistant
Section titled “The initial configuration assistant”The first time you sign in, CorePanel greets you with the Initial configuration assistant — a short, four-step wizard that confirms who runs the server and, most importantly, the name servers it will publish for every domain it hosts.
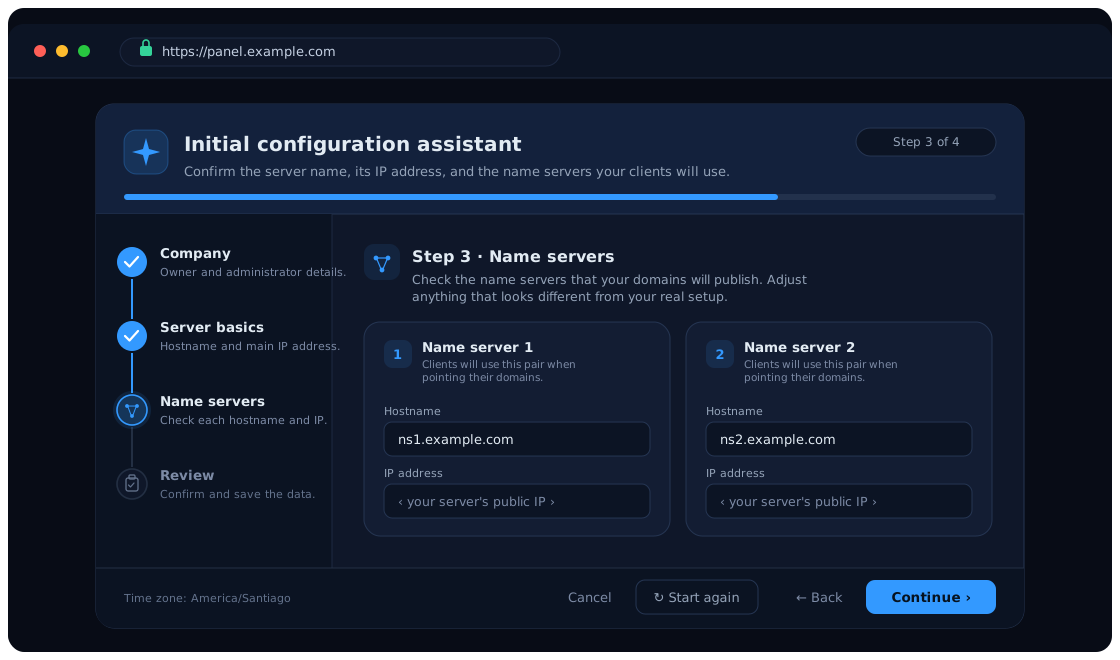
Walk through the four steps:
- Company — your name and email, used for notifications and alerts.
- Server basics — the server’s host name and its main public IP address.
- Name servers — the key step. Enter the two name servers you created in
Step 2 —
ns1.example.comandns2.example.com— each pointing at your server’s public IP. CorePanel pre-fills sensible defaults from the previous step; just confirm they’re right. - Review — check everything and click Finish.
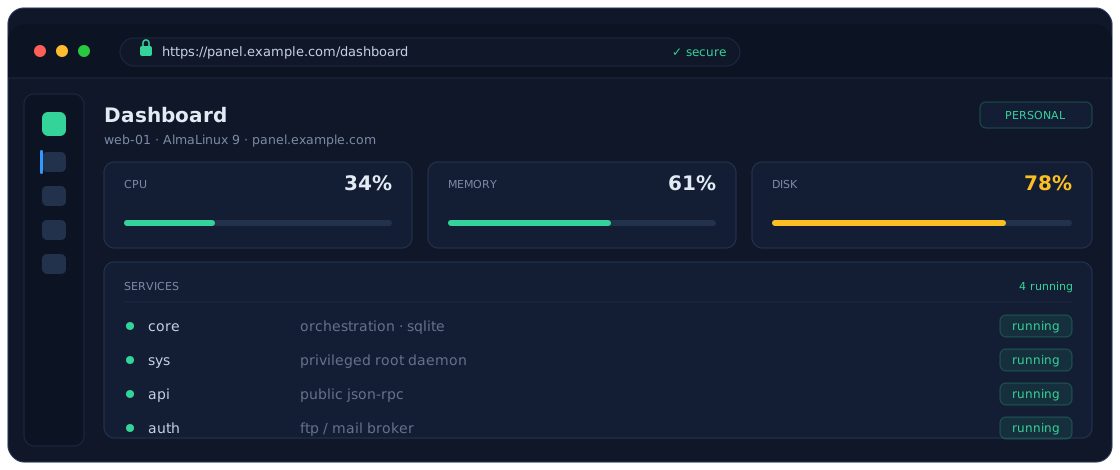
When you finish, the assistant closes and drops you on the dashboard. You should see a padlock in the address bar — the connection is secure and the certificate is trusted.
Confirm it’s all wired up
Section titled “Confirm it’s all wired up”If you’d like to confirm the plumbing from the command line, two quick checks tell you everything:
# 1. Is the domain delegated to your name servers?dig NS example.com +short# Expected: ns1.example.com. and ns2.example.com.
# 2. Does the panel domain point at your server?dig panel.example.com +short# Expected: your server's public IP, e.g. 203.0.113.45
If both look right and the browser shows the padlock, you’re done — the domain is fully prepared and CorePanel is serving it.
The shortcut: one A record
Section titled “The shortcut: one A record”Don’t need CorePanel to manage the whole domain — just want to reach the panel? Skip Steps 2 and 3. Leave the domain on your registrar’s default name servers and add a single record in their DNS settings:
| Type | Name / Host | Value |
|---|---|---|
A | panel | your server’s public IP |
That creates panel.example.com → your server. Then do Step 4 (run
corepanel system init with panel.example.com) and Step 5 to test. This is the
fastest path when the panel is all you need; you can always delegate the full
domain later.
If something’s not working
Section titled “If something’s not working”- The browser can’t find the site. DNS probably hasn’t propagated yet. Wait a
bit longer and re-run the
digchecks above. Propagation can take a few hours. dig NS example.comreturns the registrar’s name servers, not yours. The delegation in Step 3 hasn’t taken effect yet (still propagating), or wasn’t saved. Re-open the registrar’s Nameservers screen and confirm the custom name servers are set.dig panel.example.comreturns nothing. Make sure you rancorepanel system initwith the correct panel domain, and that the domain is delegated to your server (the previous check).- The padlock is missing / certificate warning on the panel domain. CorePanel issues the trusted certificate automatically once the domain resolves publicly and ports 80 and 443 are open. Give it a minute after DNS resolves, and confirm those ports are reachable. Details in Initial Server Setup → How SSL works.
See also
Section titled “See also”- Initial Server Setup — the
corepanel system initwizard, SSL, and reaching the panel before DNS resolves. - Getting Started — install CorePanel and learn the core concepts.
- SSL/TLS Certificates — how CorePanel obtains and renews certificates.