Initial Server Setup
corepanel system init is an interactive wizard that brings a freshly installed
server online. It detects the server identity, sets the panel domain, validates
DNS, creates the administrator account, and hands SSL off to CoreHttpd for
automatic, on-demand certificates. It is safe to re-run at any time.
Prerequisites
Section titled “Prerequisites”Before running the wizard, make sure you have:
- A fresh RHEL 8/9/10, AlmaLinux, or Rocky Linux server with CorePanel installed.
- Optionally, a DNS A record pointing your chosen panel domain at the server’s public IP. You can also set the domain later — see Running without a domain.
The installer leaves firewalld enabled and opens the ports this stack serves, so there is nothing to configure by hand:
| Port | Protocol | Service |
|---|---|---|
SSH port(s) from sshd_config | tcp | SSH — always opened first, so enabling the firewall can never lock you out |
| 80, 443 | tcp | Web, panel and webmail |
| 443 | udp | HTTP/3 (QUIC) |
| 53 | tcp + udp | Authoritative DNS |
| 21 and 42000–50000 | tcp | FTP control and passive range |
| 25, 465, 587 | tcp | SMTP, SMTPS, submission |
| 143, 993 | tcp | IMAP, IMAPS |
| 110, 995 | tcp | POP3, POP3S |
Deliberately not opened: MySQL (3306) and Redis, which listen locally only, and ManageSieve (4190) — the webmail reaches it over loopback, so publishing it would only add another authenticated service exposed to the internet. If you manage Sieve filters from a desktop client such as Thunderbird, open it explicitly:
firewall-cmd --permanent --add-port=4190/tcpfirewall-cmd --reloadInteractive wizard
Section titled “Interactive wizard”Run the wizard as root:
corepanel system initIt walks through six steps and finishes by applying the configuration:
  CorePanel Initial Setup  =======================
  [1/6] Detecting server identity... done        Public IP: 203.0.113.45
  [2/6] Panel domain [vps-12345.provider.com]: panel.example.com
  [3/6] Checking DNS for panel.example.com... ok        panel.example.com resolves to 203.0.113.45
  [4/6] Admin email []: admin@example.com
  [5/6] Admin password: generated
  Summary  -------  Domain:      panel.example.com  Server IP:   203.0.113.45  Admin name:  Administrator  Email:       admin@example.com  Password:    xK9#mP2$vL7@nQ4
  Apply this configuration? [Y/n] [Y]: Y
  [6/6] Applying configuration...
        Setting panel domain... done        Setting administrator... done        Setting admin password... done
  ====================================  CorePanel is ready!  ====================================
  Access:    https://panel.example.com  User:      coreadmin  Password:  xK9#mP2$vL7@nQ4
  Sign in to finish the setup: the panel asks for your company  details and nameservers the first time you open it.
At step 2 the wizard proposes the server’s OS hostname as the default, but you normally enter the panel domain you want — the address people will use to reach CorePanel. When DNS already resolves, that is all you need: open the panel at the address shown and sign in.
What the CLI does not set
Section titled “What the CLI does not set”The wizard deliberately stops at the server identity and the administrator: it sets no company details and no nameservers. Those are asked in the panel, by the initial configuration wizard that opens automatically on first login and keeps opening until they are filled in — see In the panel below.
Running without a domain
Section titled “Running without a domain”The panel domain is optional. Leave the prompt blank and the wizard finishes without
one — CorePanel is served on https://<server-ip> with a self-signed certificate:
  [2/6] Panel domain (blank to use the server IP):        No panel domain: the panel answers on https://203.0.113.45
  [3/6] DNS check: skipped (no panel domain yet)
This is also what happens automatically on an unattended install when the server’s
OS hostname is not a fully qualified domain name — which is the normal case for a
cloud image, where the hostname looks like almalinux-2gb-nyc1-01. Rather than
failing, the wizard completes and the panel asks for the domain on first login,
together with the nameservers.
Set the domain whenever you are ready, from the panel or by re-running the wizard
with --domain. Once it resolves to this server, CoreHttpd replaces the self-signed
certificate with a trusted one automatically.
A domain passed explicitly with --domain is still validated: if it is not an FQDN
the wizard stops with an error instead of quietly falling back to the IP.
When DNS hasn’t propagated yet
Section titled “When DNS hasn’t propagated yet”DNS validation is a warning, not a blocker. If the panel domain does not yet resolve to the server, step 3 flags it and the wizard continues:
[3/6] Checking DNS for panel.example.com... warning panel.example.com does not resolve to 203.0.113.45 yet. SSL will be available once DNS propagates.In this case the closing summary adds a reminder to create the A record and shows how to reach the panel in the meantime, by IP:
  Note: DNS is not yet pointing to this server.  Create an A record for panel.example.com -> 203.0.113.45  SSL will be provisioned automatically once DNS propagates.
  To reach the panel right now (before DNS), open it in your browser at:      https://203.0.113.45  Your browser will warn that the certificate is not trusted — this is  expected for the temporary self-signed certificate.  Before accepting the warning, confirm the certificate SHA-256 matches:      A1:B2:C3:D4:...:F0  (The IP address only accepts real browsers, not automated clients.)
You can finish setup now and add the DNS record later; CoreHttpd issues the real certificate automatically once the panel domain resolves. See Accessing the panel before DNS resolves for how the temporary IP access works and how to verify it safely. This block appears only while DNS is unresolved — once the panel domain points at the server, the wizard prints the standard summary with no IP hint.
Non-interactive usage
Section titled “Non-interactive usage”For automated deployments, pass the values as flags and skip the prompts:
corepanel system init \ --domain panel.example.com \ --admin-email admin@example.com \ --no-interactiveAvailable flags
Section titled “Available flags”| Flag | Description | Default |
|---|---|---|
--domain | Panel domain — the FQDN used to access CorePanel (e.g. panel.example.com) | Server OS hostname |
--admin-name | Administrator display name | Administrator |
--admin-email | Administrator email for SSL notices | Current DB value |
--admin-password | Administrator password | Auto-generated |
--no-interactive | Skip all prompts | false |
--hostname is still accepted as a deprecated alias for --domain, so
existing provisioning scripts keep working.
Provisioning script example
Section titled “Provisioning script example”#!/bin/bashPANEL_DOMAIN="panel.example.com"ADMIN_EMAIL="ops@example.com"
corepanel system init \ --domain "$PANEL_DOMAIN" \ --admin-email "$ADMIN_EMAIL" \ --no-interactive
echo "Panel ready at https://$PANEL_DOMAIN"echo "Password: $(cat /root/.corepanel_password)"After setup
Section titled “After setup”Accessing the panel
Section titled “Accessing the panel”- URL —
https://<panel-domain>(standard HTTPS, port 443). - Username —
coreadmin. - Password — shown at the end of the wizard and stored in
/root/.corepanel_password.
In the panel
Section titled “In the panel”The first time you sign in, CorePanel opens its initial configuration wizard over the dashboard. It collects what the CLI leaves out:
- Company — the name shown to your customers.
- Identity — administrator name and email, plus the panel hostname and main server IP (already filled in from the CLI run).
- Nameservers — the hostnames your customers will delegate their domains to, with the IP each one answers on.
- Review — confirm and apply.
It is not a one-time banner: the wizard opens whenever the configuration is
incomplete, and incomplete means any one of these — no administrator email, no
server hostname, no main IP, no nameservers, or a nameserver missing either its
hostname or the IP it answers on. So it keeps coming back until all of them are
answered. You can also reach it any time from Server → Configuration Wizard
in the sidebar (/initial-configuration).
Not to be confused with Server → Settings next to it: the wizard is the guided
setup you finish once, Settings is where server-wide preferences live afterwards.
Your name and email become your administrator profile
Section titled “Your name and email become your administrator profile”The name and email you enter in the Identity step are not only the server’s contact details for SSL notices: they are also written to your administrator account, so the panel knows who you are. That is what the support form uses to prefill the reply-to address and name, instead of the placeholder the installer starts with.
Your login username does not change — it stays coreadmin. Updating the
identity later, from the wizard or with corepanel system init, updates the
account again. Upgrading an existing server adopts the name and email you had
already configured, so there is nothing to redo.
Changing your panel password
Section titled “Changing your panel password”The password the installer generated is meant to be replaced. Open the account menu in the top right — your name, next to the avatar — and choose Change password.
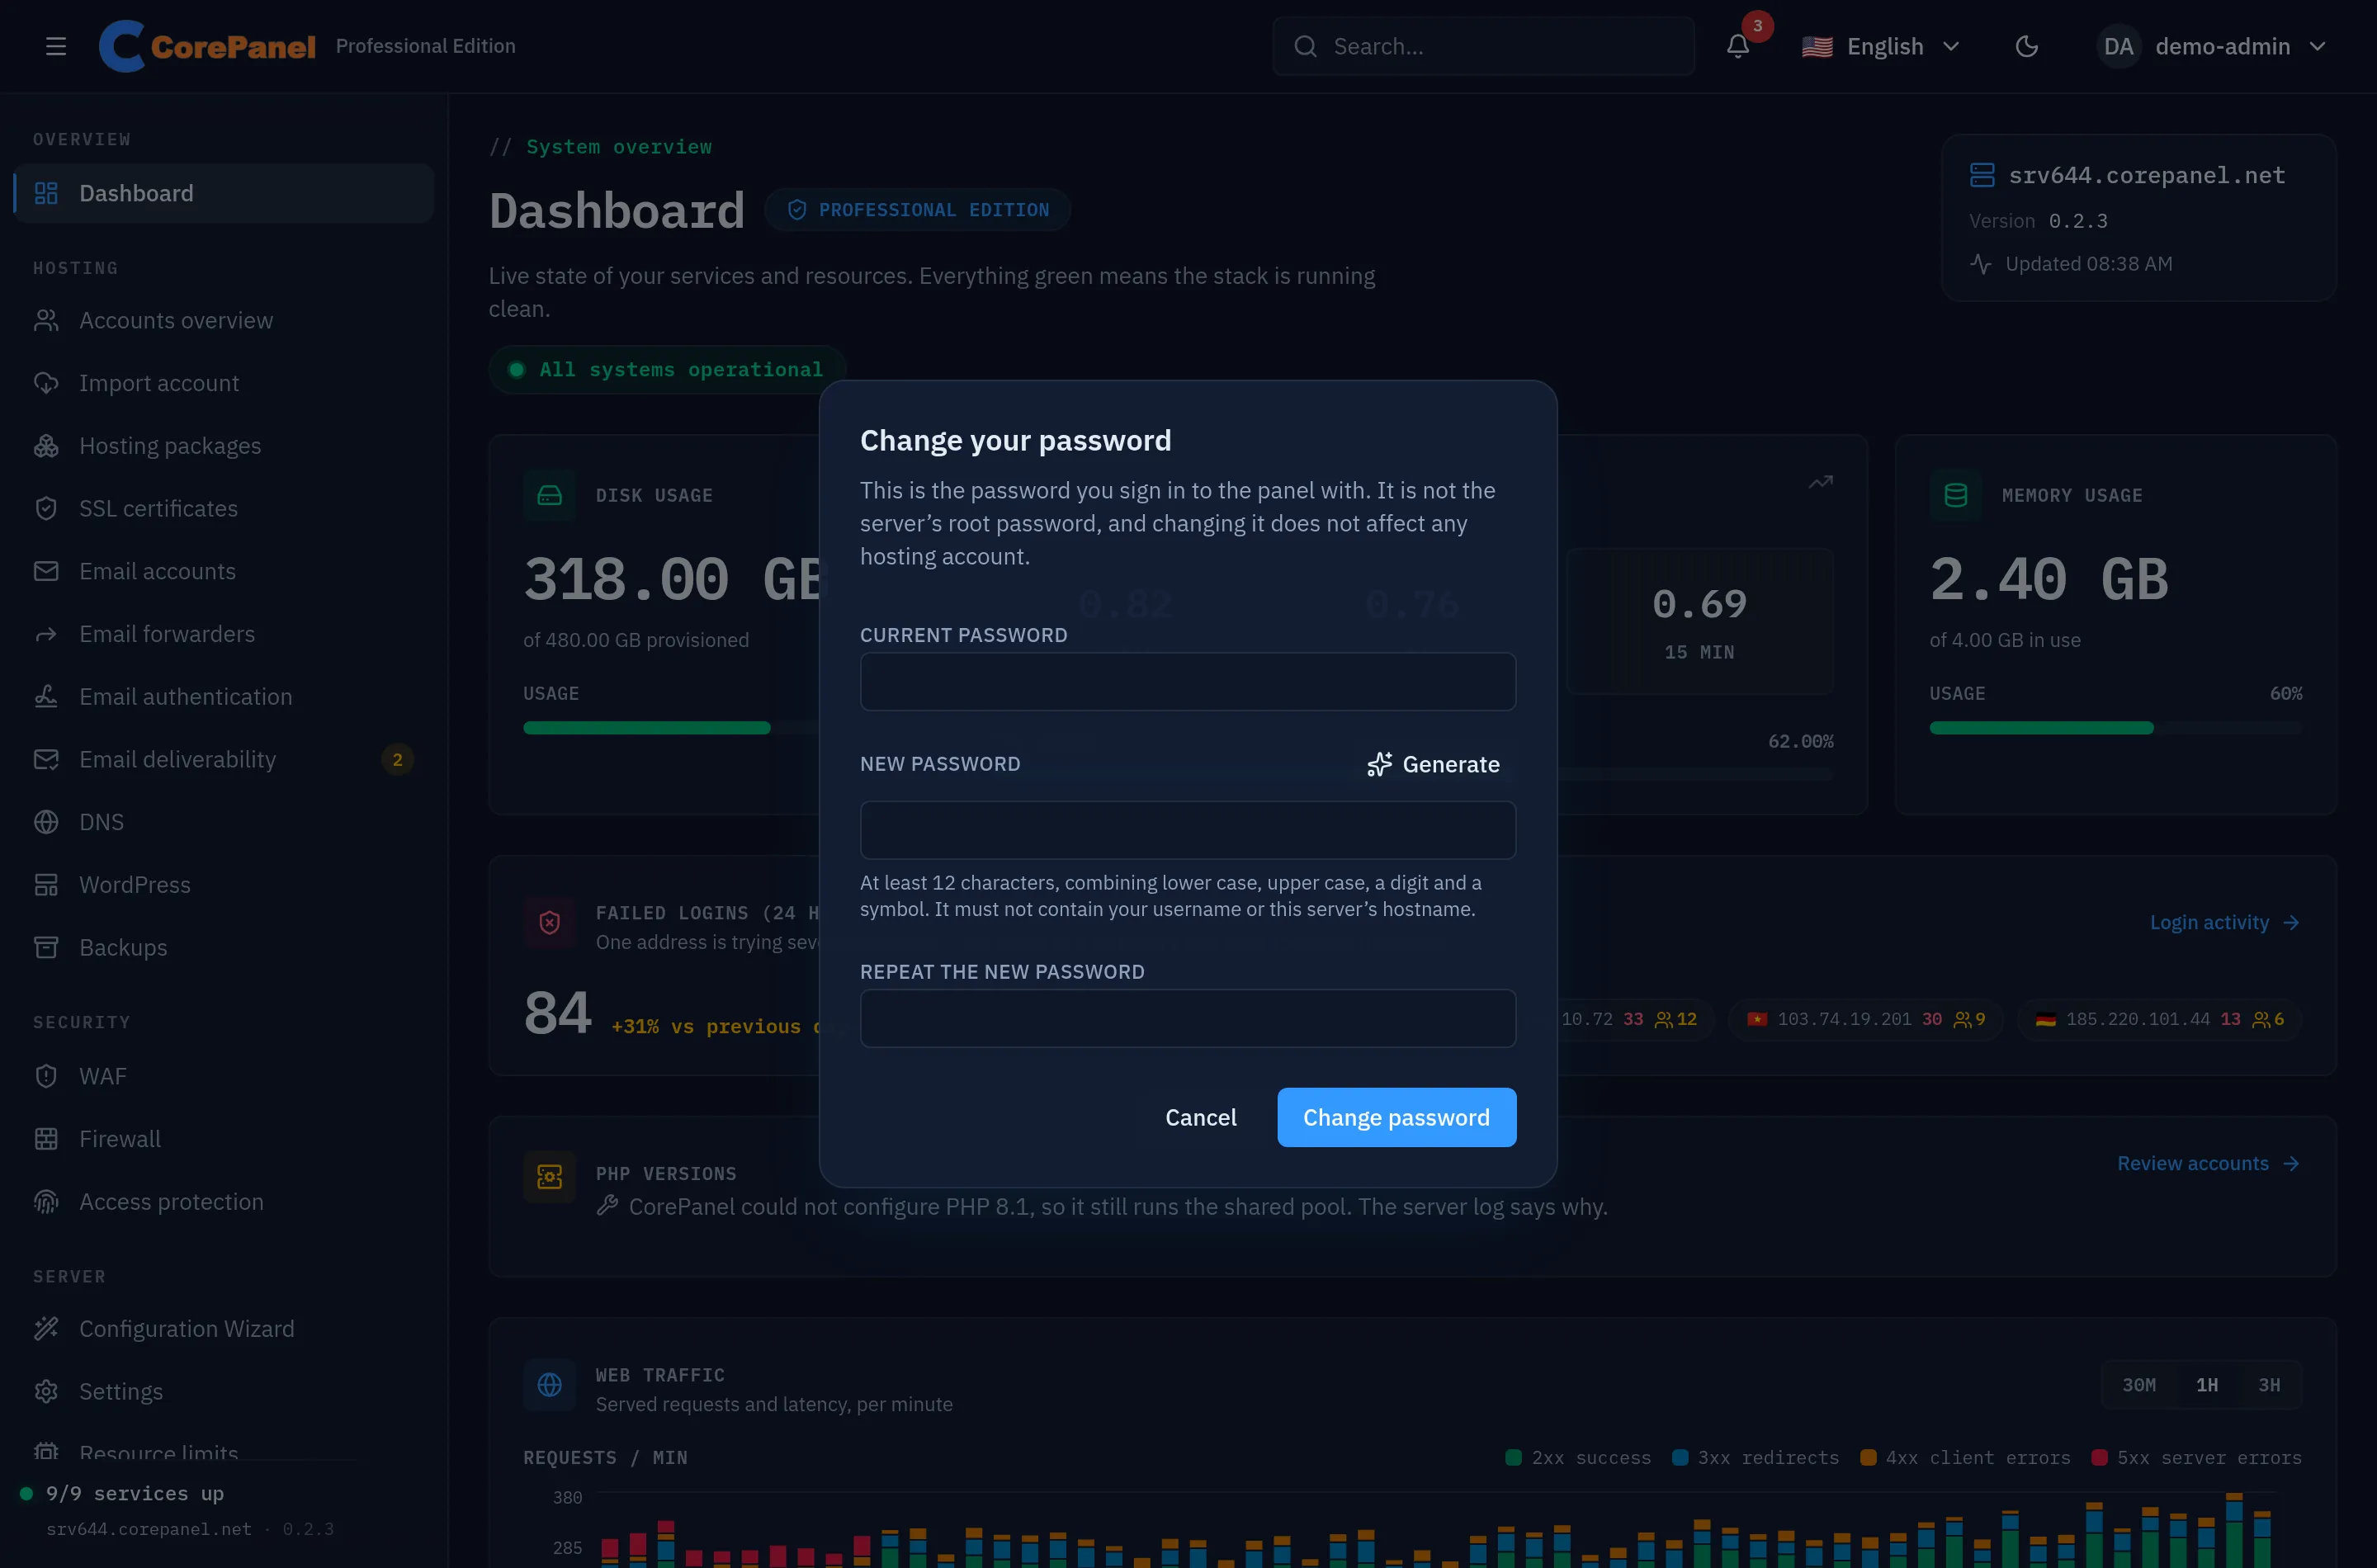
You are asked for the current password because the session cookie in your browser is not proof that you know the credential behind it. The new one has to satisfy the same policy every hosting account password does, and Generate produces one that already does.
Two things it does not change: the server’s root password, which CorePanel
never touches, and any hosting account’s password, which is edited from that
account instead. Changing yours signs nothing out — your session continues.
/root/.corepanel_password follows the change. The file the login banner
points at is rewritten with your new password, still owned by root and still
mode 0600. That keeps two things honest: the banner an operator reads over SSH,
and corepanel system init, which reuses that file when it is not given a
password — without the update, re-running the wizard to change something else
would have pushed the old password back over the new one.
Only the server administrator’s password is recorded there. An administrator belonging to a reseller changes their own credential the same way, and the file is left alone: it names one account, and root is its only reader.
When the panel asks before letting you in
Section titled “When the panel asks before letting you in”If the password an administrator signs in with does not meet the requirements above, the panel opens on one screen and nothing else until it is replaced:
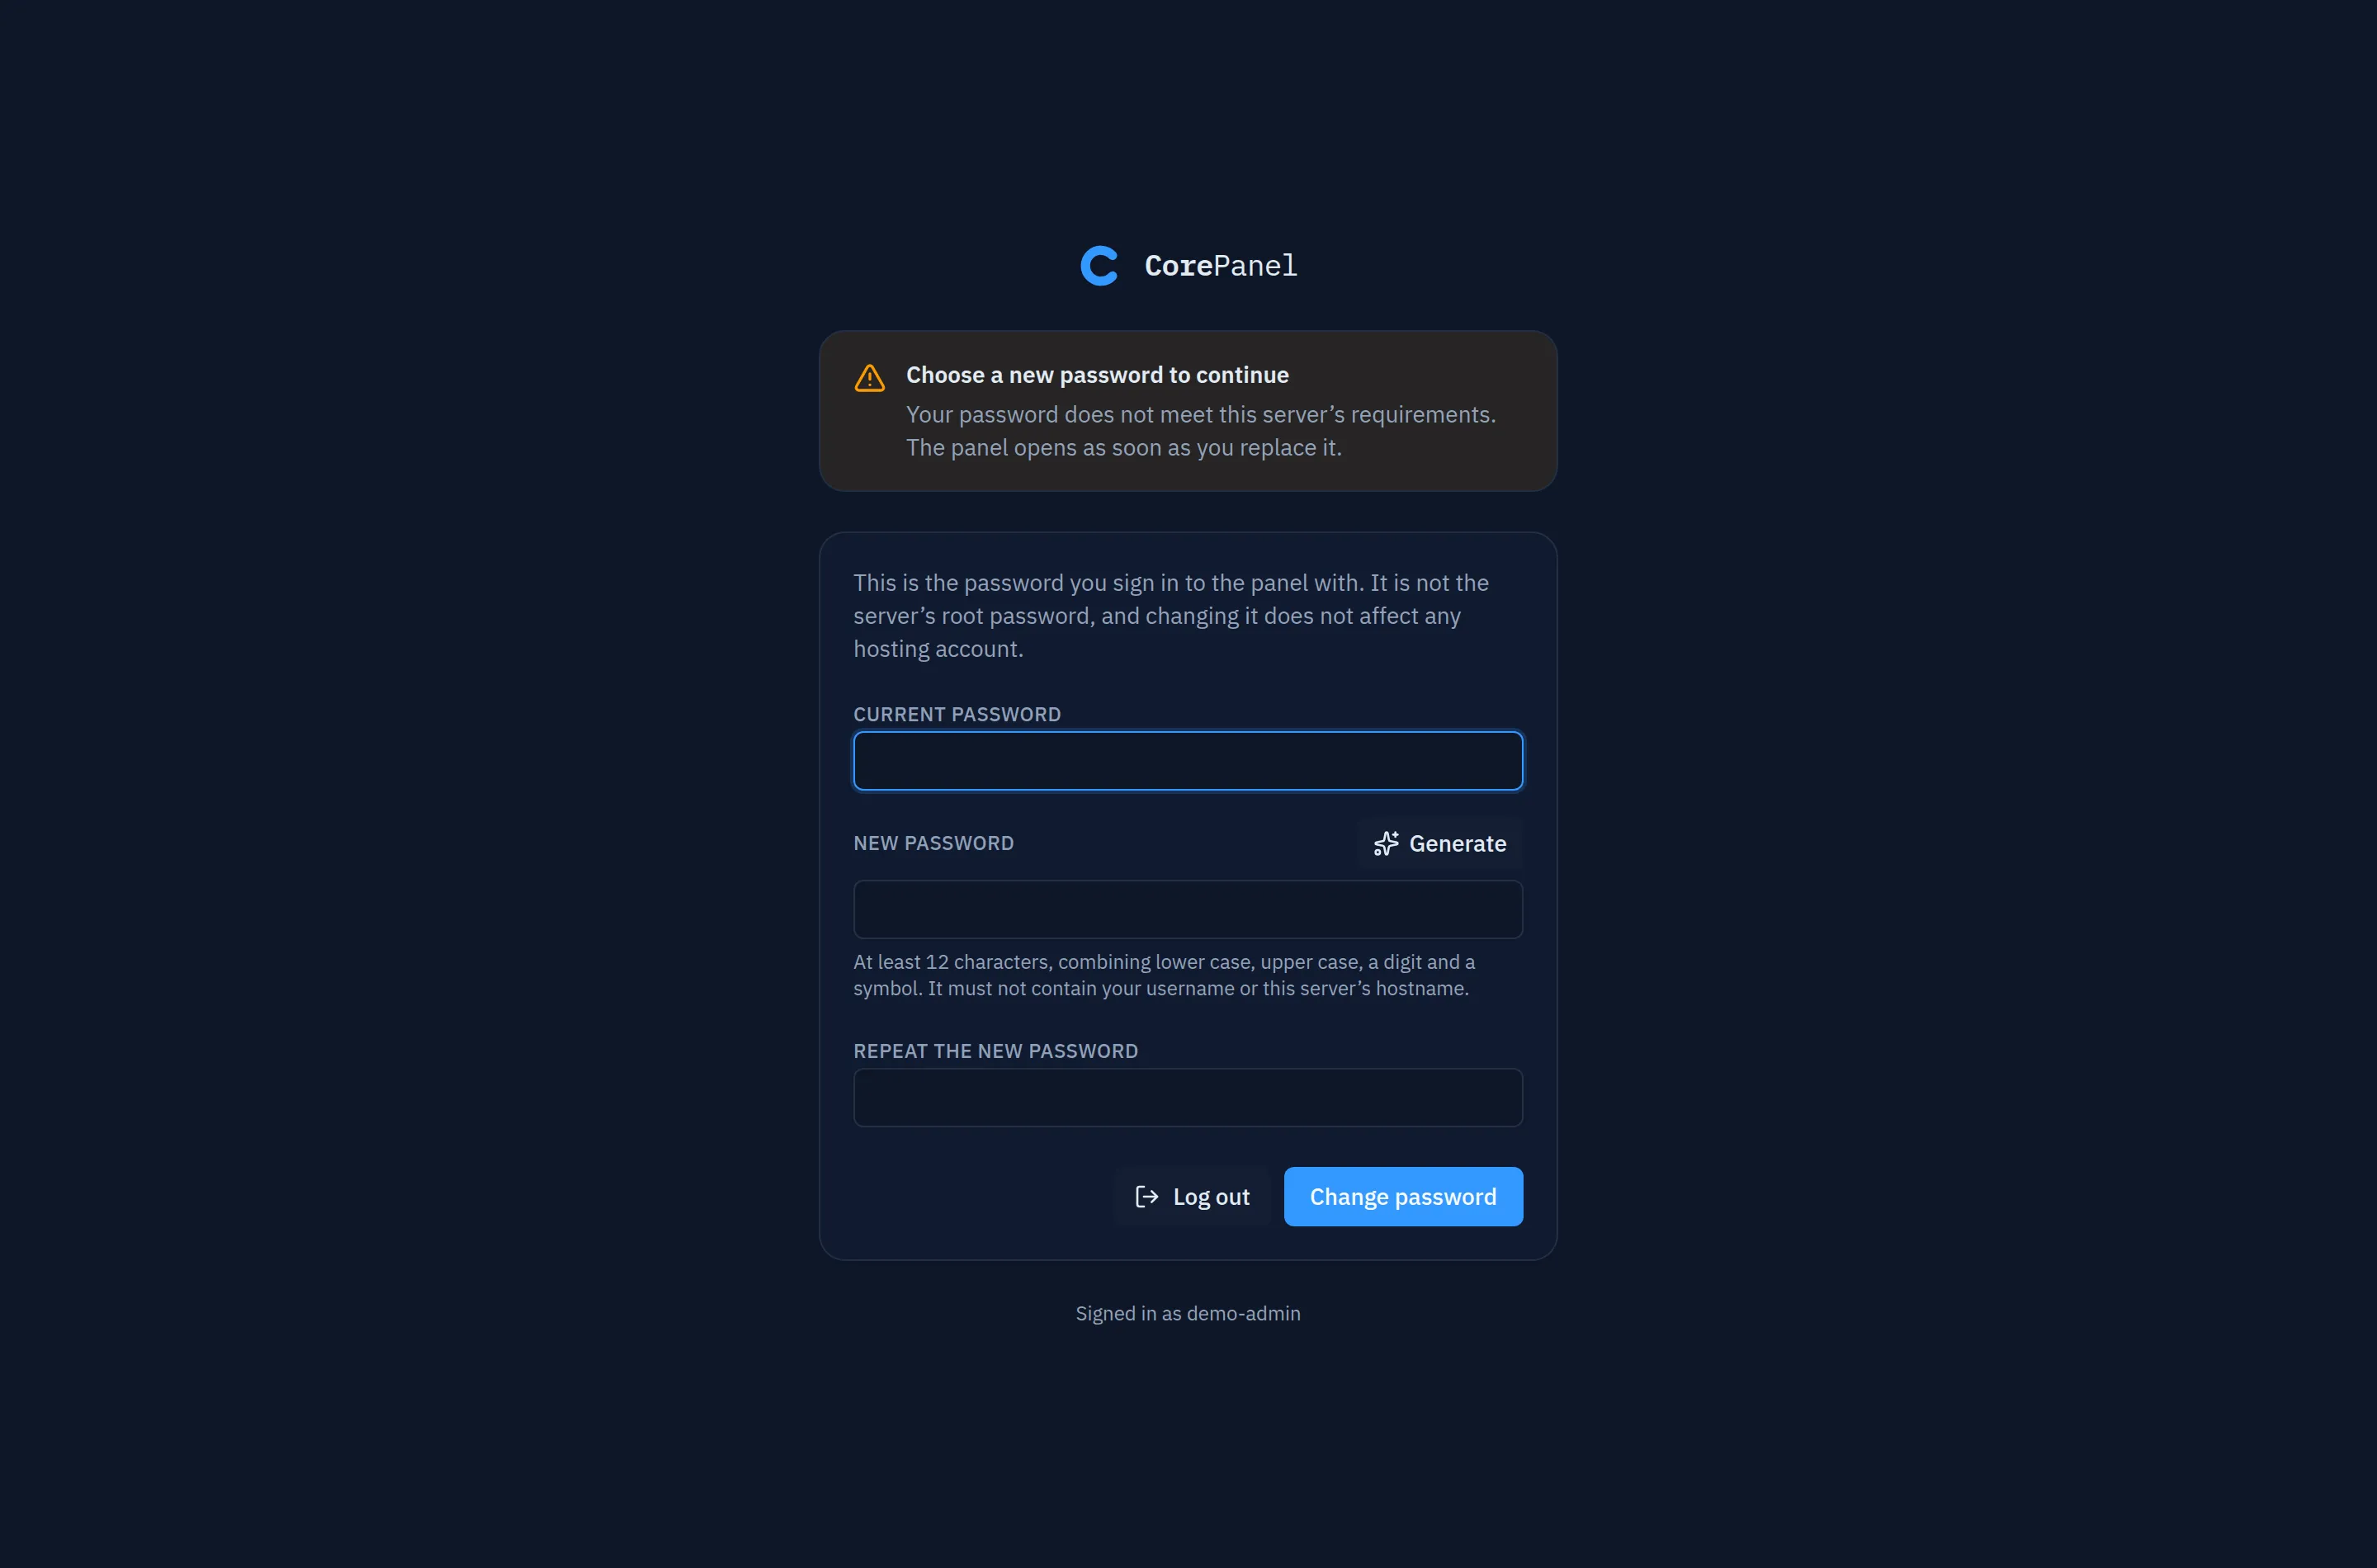
Sign-in is the only moment the password itself exists to be judged — a stored
hash never can be — so that is where the check happens. It is not a lockout: the
credential still opens the panel, and the session can do exactly three things
until the password moves — read its own profile, change the password, and log
out. Everything else answers 428.
This is why it comes up at all: corepanel system init --admin-password stores
whatever it is given without checking it, so a server set up with a weak password
meets this screen once, on the next sign-in. A password the wizard generated
satisfies the requirements by construction and never does.
If you would rather fix it from the shell — or the panel is too old to draw this screen — re-running the wizard with a password that meets the requirements both sets it and clears the request:
corepanel system init --admin-password "NewSecurePassword!" --no-interactiveThe same screen appears for a newly created administrator, with a different sentence: their password was chosen by whoever created the account, so they are asked to replace it before the panel opens. Nothing is wrong with the password itself — the point is that somebody else knows it.
Adding more administrators
Section titled “Adding more administrators”The wizard creates one administrator. corepanel admin creates the rest:
corepanel admin create jane --email jane@example.com --name "Jane Roe"Without --password a strong one is generated and printed once. Give it to the
person; the panel asks them to replace it the first time they sign in.
corepanel admin list shows who exists, and corepanel admin delete <username>
removes a login. Deleting an administrator removes the login and nothing else —
hosting accounts belong to the organisation, not to the person who created
them — and the last super administrator cannot be deleted, because a server
nobody can administer is not a state to leave a machine in.
An administrator is not a reseller
Section titled “An administrator is not a reseller”These are two different things and the panel keeps them apart:
| An administrator | A reseller | |
|---|---|---|
| What it is | a person who signs in | an organisation that sells hosting |
| Managed with | corepanel admin | corepanel seller |
| Has a password | yes — it is the login | no, it cannot sign in at all |
| Owns accounts | no | yes |
Every administrator belongs to exactly one organisation, and that is what decides what they see. An administrator of the organisation that owns the server sees everything; an administrator of a reseller sees only that reseller’s accounts and never the server itself. A reseller with no administrator is a perfectly normal state — its accounts are owned and nobody can sign in to manage them — while an administrator without an organisation is impossible.
A super administrator additionally may do the server-wide things: licensing, the host firewall, PHP versions, the server logs. The administrator the wizard creates is one. Only a super administrator may create another administrator, and only ever inside the organisation that owns the server — a reseller’s administrator may staff their own organisation and nothing beyond it.
Creating an administrator for a reseller requires CorePanel Business. Adding a second administrator for your own organisation works on every edition.
How SSL works
Section titled “How SSL works”CoreHttpd manages certificates for you, with nothing to configure:
- Certificates are obtained from Let’s Encrypt on demand via the TLS-ALPN-01 challenge the first time the panel is served over HTTPS.
- They renew automatically before expiry.
- Issuance requires the panel domain to resolve publicly to the server and port 443 to be reachable.
The login banner
Section titled “The login banner”CorePanel maintains a block in /etc/motd, so the panel URL is waiting for you
the next time you log in over SSH — useful when the installer’s output has
scrolled away, and essential on a cloud or marketplace image where it went to a
boot log you never saw:
### BEGIN COREPANEL — generated, do not edit
  CorePanel
  Panel:     https://panel.example.com             https://203.0.113.45  (by IP, self-signed certificate)
  User:      coreadmin  Password:  /root/.corepanel_password  (root only)
  Docs:      https://www.corepanel.net/docs
### END COREPANEL
It is rewritten whenever the panel domain changes, so the URL it shows is never
a stale one. Anything already in /etc/motd — your own banner, the one the cloud
image ships — is kept untouched outside the markers.
The password itself is deliberately not in the banner. /etc/motd is shown to
every user who logs in, and hosting accounts that are allowed to log in get a real
shell, so a password printed there would be readable by all of them. The banner
points at /root/.corepanel_password, which only root can read:
cat /root/.corepanel_passwordAccessing the panel by IP
Section titled “Accessing the panel by IP”Let’s Encrypt cannot issue a certificate until the panel domain resolves publicly
to the server, so immediately after a fresh install the trusted
https://<panel-domain> URL is not available yet. Reach the panel directly by
IP instead:
https://<server-ip>This works from the moment CorePanel is installed, before the panel has a domain at all — which is what makes it possible to finish setup on a server you have not pointed any DNS at yet. The endpoint then stays available for good: it is also how you get back in when DNS breaks, an A record is moved, or the hostname’s certificate expires. A few things to know about it:
- The certificate warning is expected. The connection is encrypted, but no certificate authority issues for a bare IP, so the certificate is a self-signed one and the browser flags it as untrusted. Accept the warning to continue.
- Verify the fingerprint. The wizard prints the certificate’s SHA-256 fingerprint when it finishes. Because you ran the wizard over SSH — a trusted channel — you can confirm the fingerprint your browser shows matches it before trusting the connection.
- Browsers only. The IP endpoint deliberately rejects automated clients, so internet scanners that probe the address cannot reach the panel.
- Use the hostname day to day. Once the A record resolves and the real Let’s
Encrypt certificate is issued,
https://<panel-domain>is the URL to use — no warning, and it is what the panel links to. To close the IP endpoint entirely, setEnableIPAccess = falsein/etc/corehttpd.iniand restart corehttpd — the file is read at start-up, so a reload does not pick it up.
If you want a trusted certificate from the very first visit, add a temporary entry to your local machine’s hosts file pointing the panel domain at the server IP, then create the public DNS record when convenient.
Troubleshooting
Section titled “Troubleshooting”DNS not resolving
Section titled “DNS not resolving”Check what the panel domain currently resolves to:
dig panel.example.com +short# Should return your server's public IPIf it returns nothing or the wrong address, verify the A record at your DNS provider and allow up to 15 minutes for propagation. You do not need to re-run the wizard — CoreHttpd picks up the certificate automatically once DNS is correct.
SSL certificate not working
Section titled “SSL certificate not working”Confirm the web ports are open and CoreHttpd is healthy:
# CoreHttpd service statussystemctl status corehttpd
# Recent CoreHttpd logs, including certificate errorsjournalctl -u corehttpd --no-pager -n 50
# Confirm the web ports are open. The installer opens them, so an empty result# here means something closed them afterwards — or that the server sits behind a# cloud provider's own firewall or security group, which CorePanel cannot see.#   443 — TLS-ALPN-01 validation and HTTPS#   80  — HTTP→HTTPS redirectfirewall-cmd --list-ports
# Re-open them if they are missingfirewall-cmd --permanent --add-port=80/tcp --add-port=443/tcpfirewall-cmd --reload
Re-running the wizard
Section titled “Re-running the wizard”The wizard is idempotent — each run reconfigures every setting, so it is safe to run again to change the panel domain, email, or password:
corepanel system initPassword recovery
Section titled “Password recovery”If you are still signed in, change the password from the panel — the account
menu in the top right, Change password. The steps below are for the case
where you are not: they need root on the server, which is the only credential
that can override a panel password without knowing it.
The server administrator’s password is kept in /root/.corepanel_password,
owned by root and mode 0600. It is written by the installer and updated
whenever that administrator changes their password in the panel, so it names the
password that works right now:
cat /root/.corepanel_passwordIf the file is missing or does not work, set a new password by re-running the wizard:
corepanel system init --admin-password "NewSecurePassword!" --no-interactiveThe wizard reconfigures every setting on each run, so it is the heavier of the two answers. Reach for it when the panel is what is unavailable.
See also
Section titled “See also”- Mail System Configuration — setting up the email stack.